my-cumbria-logo, my-cumbria-logo Toggle navigation

You are going to use images in some of your assignments and understanding the basics of finding, resizing and positioning those images is very important if you want them to look right on the page.

Referencing & Copyright

Do not forget that you will need to Reference any images that you use, no matter where your source them from and whilst you may be able to use images under Fair Use, you should also consider the rules around Copyright and images which describes where and how you can use your sourced pictures. 

  • Finding images

    There are plenty of places to locate suitable images for your assignments, either to directly describe something (e.g. graphs, medical diagrams, etc.) or to represent something (e.g. children in a classroom, hospital, etc.), and there are different ways to capture those images.

    Graphs, diagrams and images on a web page

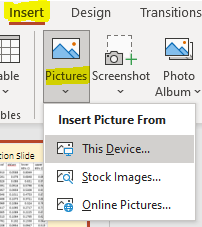
    If the graph or picture is presented as an image on the web page, you can often right-click on the image and select "Save as..." or "Save image as...".

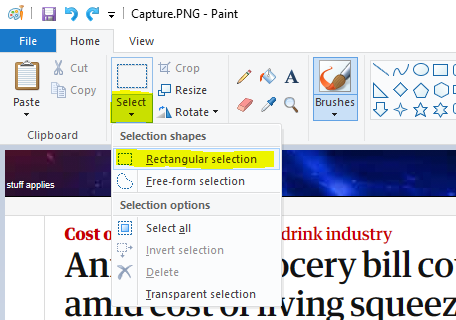
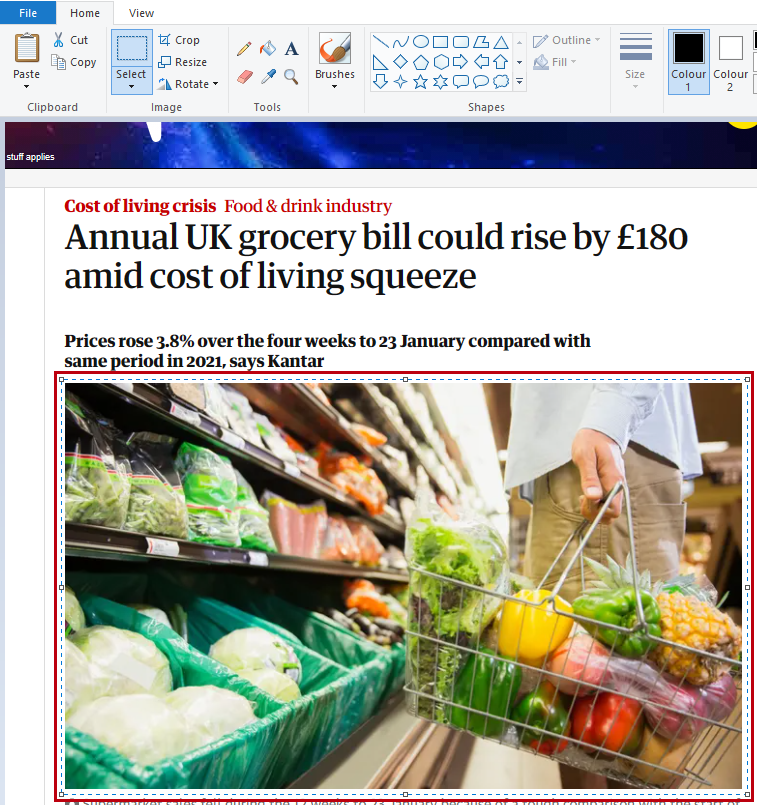
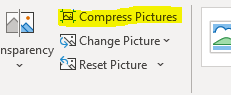
    Some images are placed onto a web page in a protected format and will either download as some strange format (e.g. webp) or cannot be download at all. In these cases you will need meed to use a Snipping Tool to capture the image from the page.

    If a graph or table is not presented as an image, you may also need to use a Snipping Tool to capture a copy of these.

    Graphs, diagrams and images in an ebook

    Most content in ebooks is protected and will restrict your ability to save content or images onto your own device. Even where you can download an ebook as a PDF, you will often find that you still cannot save inividual images. This means that to capture images from most ebooks you will need to use a Snipping Tool.

    Graphs, diagrams and images in a physical book

    To use images, diagrams or graphs from a physical book you will need to create a digital copy of the image. You can easily do this in one of two ways:

    1. Scan the page of the book using the printers at university. This is then emailed to you as a PDF. You can view the PDF on your computer and use a Snipping Tool to capture just the bit you want.
    2. Take a photograph of the page using a mobile device and then email that image to yourself so you can insert it into your document.

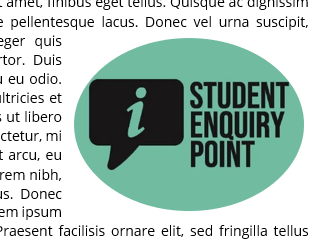
    Images from image sharing websites

    There are lots of sites where you can legally download and use images for any purpose. Locate an image on one of these sites and select the Download button. Some of our suggested sites may require you to create a free account.

    Our favourite free image sites include pixabay.com and pexels.com. The Copyright and Images page includes a list of additional sites where you can download images.

    Remember 

    No matter where the image comes from, you will need to Reference it. 


  • Cropping images in MS Paint

    Microsoft Paint is available on all Windows laptops and computers. Whilst it does provide editing tools for images, the most useful tool is its ability to crop an image.

    This works brilliantly if you have capture the whole of a web page and want to trim it down to just the bit or image you want.

    Cropping your image using MS Paint

    1. Open Paint

    2. Select the File button in the top menu followed by Open to then browse for the image you want to crop-trim:

    paint 01,

    3. Choose the Select tool - choose Rectangular selection:

    paint 02,

    4. With the Rectangular selection tool chosen, you can now draw a rectangle around the part of the image you want to keep:

    paint 03,

    5. This will then leave you with the image you were trying to capture. You can resave this image (File > Save as) as either a PNG or JPEG to use in your assignment:

    paint 04,

    Note: MS Paint also has Resize and Rotate tools if you need to make your chosen image smaller or turn it around.

  • Images in Word

    It is quite easy to do some basic image editing within a Word document. This will usually be restricted to resizing or positioning images on the page, but you can also crop an image to cut it down and remove any unnecessary parts you may have captured.

    Positioning an image on the page

    When you insert an image into a Word document you will find that the default settings will place that image on the left-hand side of your page and will push any text down below it:

    image_word_01,

    To reposition this image to any other place on the page, you will need to tell Word how to work with the image. Click on the image and select the image layout button that appears next to the image and choose the Square option:

    image_word_02,

    With Square selected, you can now position the image anywhere on the page and your text will wrap around it:

    image_word_03,

    There are other options for image layout - feel free to choose them and see how it affects your image positioning.

    Resizing your image

    Now that you have repositioned your image you may find that it is either too big or too small for the place where you want to display it. Simply click on the image to show the Resizing Handles:

    image_word_04,

    You can click and hold onto these handles to resize your image by dragging.

    image_word_05,

    Quick tips: 1. If you use the corner handles - the image will resize evenly horizontally and vertically. 2. Don't make your image much bigger than the original size because it will start to blur.

    Cropping an image

    Cropping images (chopping off bits you don't need) is also really easy to do after you have put your image(s) into a Word document.

    Click on the image that you want to Crop to select it.

    The top menu bar will now change to add a Picture Format toolbar (partial toolbar shown):

    image word 06,

    From this new toolbar, you can choose to Crop your image. The basic cropping tool is available from the Crop dropdown button:

    image_word_07,

    Selecting Crop will place drag bars onto your image - drag these bars to crop your image from each respective side:

    image_word_08,

    When you are happy with the new shape/size of the image - hit the Enter key on your keyboard to confirm the Crop:

    image_word_09,

    From the Crop dropdown button you can also choose to Crop to shape - if your image is largely decorative you can use this option to help make your images better fit the assignment:

    image_word_10,

    And we end up with something like this:

    image_word_11,

    Compressing image file size

    If you put a number of images into your document, you may find that the document size has become very large. You can easily reduce the file size of the images used and make you document smaller (thus easier to email or submit for assessment).

    Select any image in your document.

    In the Picture Format toolbar - select Compress Pictures:

    image_word_12,

    A new popup window will provide you with some options for compressing your images:

    image_word_13,

    To compress all of the images in your document, untick "Apply only to this picture".

    If you have cropped any images, leaving the next option ticked will discard those bits you previously chopped off.

    "Use default resolution" will usually work best and will keep your images looking clear.

    More...

    There is a lot more you can do to images in a Word document including recolouring, changing transparency, adding captions, etc. to better explore some of these options, please consider the following resources:

    Linkedin Learning Videos:

    Add and format images (Word 365)

    Correct images in a document

    Crop an image in a Word document

    Other resources

    Word guides and tutorials

    We have also created an interactive resource that shows you all of the main things you need to be able to do in Word 365 to complete your assignments: Assignment Journey in Word (Office 365)

  • Images in PowerPoint

    It is very common to use images in a PowerPoint presentation, but you should be selective about what you include.

    • Images as decoration - try to use these sparingly (either one larger image or two smaller ones are usually enough per slide).

    image_ppt_01,

    • Images as a concept - if you are using images to describe a concept, then one large one is usually enough for you to talk over. Any more can become confusing and cluttered.

     image_ppt_02,

    • Images of tables - think about what your audience can see from a distance. Small tables and limited amounts of data will remain readable.

     image_ppt_04,

    • Charts and graphs - these can work well visually so long as any data and labels are also clear.

     image_ppt_03,

    Inserting images in PowerPoint

    There are two main ways to add images to your PowerPoint presentation:

    1. Locate your image(s) in your file explorer and simply drag them into the PowerPoint slide.

    2. Go to the Insert tab in the main top menu bar and select Pictures:

    image_ppt_05,

    You have a few choices at this stage. This Device... will let you browse for images on your computer. Stock Images... are a curated collection of freely available images. Online Pictures... takes you to a Bing image search.

    Positioning your image(s)

    Images, tables, charts, shapes and text boxes in PowerPoint are treated as objects. These objects can be dragged to any position on a slide, but other objects do not move out of the way like they do in Word. To fix positioning, you may need to split your text into more than one box if you want it to wrap around your image:

    image_ppt_06,

    In this example, I have split my text into 3 separate boxes - one above the image, one to the left and one below:

    image_ppt_07,

    Resizing images

    Now that you have repositioned your image you may find that it is either too big or too small for the place where you want to display it. Simply click on the image to show the Resizing Handles:

    image_ppt_08,

    You can click and hold onto these handles to resize your image by dragging.

    Quick tips: 1. If you use the corner handles - the image will resize evenly horizontally and vertically. 2. Don't make your image much bigger than the original size because it will start to blur.

    Rotating images

    When you select an image and see the Resizing Handles - these is an additional handle that can be dragged to rotate the image:

    image_ppt_09,

    Cropping images

    Cropping images (chopping off bits you don't need) is also really easy to do after you have put your image(s) into a Word document.

    Click on the image that you want to Crop to select it.

    The top menu bar will now change to add a Picture Format toolbar (partial toolbar shown):

    image_ppt_10,

    From this new toolbar, you can choose to Crop your image. The basic cropping tool is available from the Crop dropdown button:

    image_ppt_11,

    Selecting Crop will place drag bars onto your image - drag these bars to crop your image from each respective side:

    image_ppt_12,

    When you are happy with the new shape/size of the image - hit the Crop button again to confirm the Crop: 

    image_ppt_13,

    From the Crop dropdown button you can also choose to Crop to shape - if your image is largely decorative you can use this option to help make your images better fit the assignment by making them round, arrow shaped or any of the other options.

    Compressing image size

    It is usual to put a number of images into your presentation and this might mean that your PowerPoint size has become very large. You can easily reduce the file size of the images used and make you presentation smaller (thus easier to email or submit for assessment).

    Select any image in your document.

    In the Picture Format toolbar - select Compress Pictures:

    image_word_12,

    A new popup window will provide you with some options for compressing your images:

    image_word_13,

    To compress all of the images in your document, untick "Apply only to this picture".

    If you have cropped any images, leaving the next option ticked will discard those bits you previously chopped off.

    "Use default resolution" will usually work best and will keep your images looking clear.

    More...

    There is a lot more you can do to images in a PowerPoint presentation including recolouring, changing transparency, adding captions, etc. to better explore some of these options, please consider the following resources:

    Linkedin Learning Videos

    Add images

    Crop and convert images and icons

    Other resources

    PowerPoint guides and tutorials

  • Using images

    The first thing to understand is whether or not the image is necessary? Does this image convey a message or add to the assignment? Or is it purely decorative?

    In a presentation a decorative image can do a lot to convey meaning about what you are talking about and should link directly to any points you are making.

    Also in presentations, a conceptual image can fill an entire slide if you are confident that it fits the message you are talking about. For assignment submissions you will probably need to add your spoken notes to the footer of the slide so that a tutor understands what the slide means.  

    In the case of a graph, chart or table - does it clearly explain what it means? Is the data readable and are any labels relevant? Do you explain, in the text, what you are showing with the image?

    And always remember to Reference your images.

Edit page