my-cumbria-logo, my-cumbria-logo Toggle navigation

Snipping Tools are a utility for grabbing an image of all or part of your screen. Snipping tools are most useful for grabbing just a part of the screen in front of you and may be used to show or demonstrate something in a tutorial or to capture some information for an assignment.

Both Windows and Mac have a snipping facility built in.

  • Why use a snipping tool?

    Using a snipping tool can make a big difference when trying to insert an image into an assignment and if captured from the web allows you to remove all of the clutter on the page and just concentrate on the information you want to display. As you can see, one of the examples below is much clearer than the other:

    Full page screenshot using the Print Screen option on your device

    snipping_tool_example_01,

    Partial capture of a page using a snipping tool

    snipping_tool_example_02,  

    Referencing

    Just because you are capturing part of a page or another resource as an image, does not mean you can skip referencing. You must reference the original source of the information. See Referencing, Turnitin and Plagiarism for more information.

    Bell, E. (2021) Even for a company that specialises in PR disasters, Facebook has excelled with its Australian blackout. Available at: https://www.theguardian.com/technology/2021/feb/18/even-for-a-company-that-specialises-in-pr-disasters-facebook-has-excelled-with-its-australian-blackout (Accessed: 18 February 2021).

  • Windows Snipping Tool

    The Windows Snipping Tool is very easy to use and allows you to capture a fully screen or just part of it.

    Open the Snipping Tool

    Search for the Snipping Tool using the Windows Cortana search box at the bottom of your screen:

    snipping_tool_01,

    Click on Snipping Tool to open it.

    snipping_tool_02,  

    Setting the mode

    The first time you open the Snipping Tool it may have defaulted to taking a full-screen screenshot. You probably want to change this to enable you to grab a part of the screen. I always have mine set to Rectangular Snip so I can grab just bits of the screen:

    snipping_tool_03,  

    The Snipping Tool will now keep this setting until you change it, even if you update or restart your computer.

    Taking a snip

    You will need to make sure your screen is displaying the content or area you want to snip, as you will not be able to move things around after you click on New snip (don't worry about the Snipping Tool window - this will hide itself from your snip):

    snipping_tool_04,

    Once you click on New, your computer screen(s) will fade slightly and your mouse pointer will become a cross. Click and drag this cross to draw a red rectangle around the content you want to capture:

    snipping_tool_05,  

    This snip is now saved into the Snipping Tool window for you to annotate, save, copy or share.

    Marking / annotating

    Using the pen, highlight and eraser tools, I can mark or delete parts of my captured image:

    snipping_tool_06,  

    Saving your snip

    When you are happy with your image, you can save it to your computer. Click the Save button and browse for the location to save it:

    snipping_tool_07,

    Copy and paste your snip

    You can also copy the Snip to your clipboard and paste it straight into another program, such as Word or PowerPoint.

    snipping_tool_08,  Please note that you might also want to Save your snip in case you need it again.

    Sharing your snip

    You can also share your snip directly with another user via email. The Snipping Tool will try to use your default email program, so if you don't have one setup on your computer, it might be best to Copy into an email or Save and then email it.

    snipping_tool_09,

  • Windows Snip & Sketch

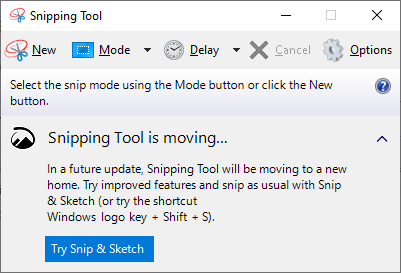
    Whilst the Windows Snipping Tool is the goto utility for millions of people, Microsoft have now produced an updated tool that provides more functionality. This is the newer Snip & Sketch and it is included in all versions of Windows 10.

    Open Snip & Sketch

    You can search for Snip & Sketch using the Cortana search at the bottom of your screen:

    snip_search_01,  

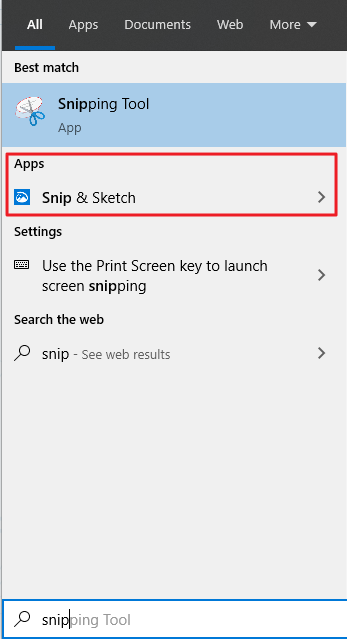
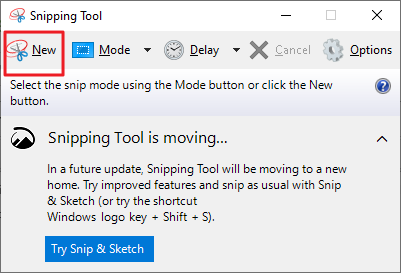
    Click on Snip & Sketch to open it:

    snip_sketch_01,  

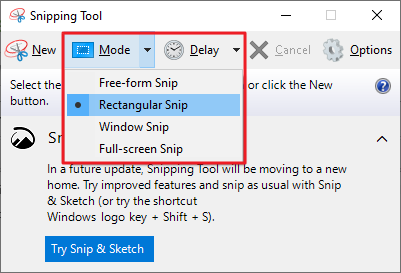
    Click on New to take a new snip of your screen - your screen(s) will fade slightly and your mouse pointer will allow you to draw a rectangle around the section of your screen that you want to capture. This part works just like the original Windows Snipping Tool (as described above).

    The Snip & Sketch Toolbar

    snip_sketch_02,

    New - This will trigger a new snip - draw around the section of your screen that you want to capture.

    Open file - You can open other images in Snip & Sketch to use the cropping and drawing tools.

    Undo / Redo - Undo or redo your previous action. Useful if you've drawn, erased or cropped something wrongly.

    Touch - This is touch-based drawing for users with a touchscreen Windows device.

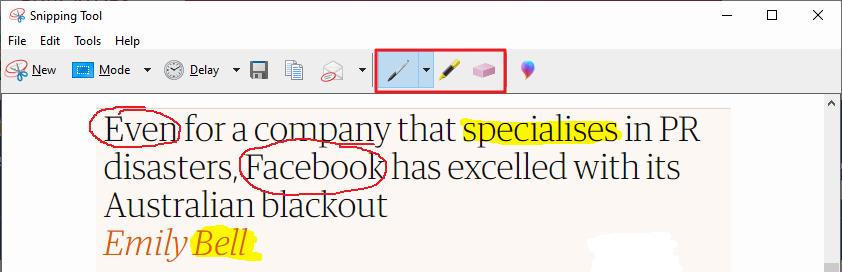
    Pen tools -  Pen, pencil and highlighter for drawing on your snip. Different colours and thicknesses available (see below).

    Eraser / Ruler - Erase parts of your snip and show a ruler on screen for when you need to work more accurately.

    Crop - Grab the edges of your snip and drag them in to crop out any excess screen that you have captured.

    Save / Copy / Share - Save your snip, copy and paste it into another program e.g. Word or share your snip via email.

    More - This includes Open with (if you want to reopen your snip in another image editing program that you have), Print options, Settings and some Help resources.
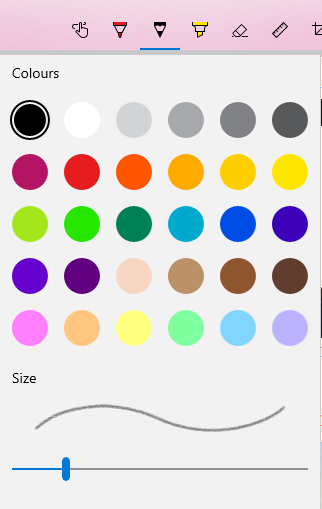
    Pen tools

    If you select one of the pen tools in Snip & Sketch, a small drop-down arrow will appear on the button for that tool. Click on this to change the colour and thickness of the pen you have selected:

    snip_sketch_03,

    Take a quick snip

    Snip & Sketch can also be accessed using the following keyboard shortcut: Windows Logo Key + Shift + S which will allow you to take an instant snip whilst in the middle of doing something else.

    The snip you capture will popup at the bottom of your screen to give you editing options:

    snip_sketch_04,  

    Or you can simply paste it into a document as it is temporarily stored in the Windows clipboard.

  • Snipping on a Mac

    The Mac equivalent of the Windows Snipping Tool is so much baked into the operating system that until OSx Mojave it doesn't even have a name.

    The following information is taken from Apple Support: Taking a screenshot on your Mac

    Taking a screenshot

    1. To take a screenshot, press and hold these three keys together: Shift, Command and 3

    mac-key-combo-diagram-shift-command-3,

    2. If you see a thumbnail in the corner of your screen, click it to edit the screenshot. Or wait for the screenshot to be saved to your desktop.

    Capture a portion of the screen

    1. Press and hold these three keys together: Shift, Command and 4.

    mac-key-combo-diagram-shift-command-4,

    2. Drag the crosshair to select the area of the screen to capture. To move the selection, press and hold Space bar while dragging. To cancel taking the screenshot, press the Esc (Escape) key.

    3. To take the screenshot, release your mouse or trackpad button.

    4. If you see a thumbnail in the corner of your screen, click it to edit the screenshot. Or wait for the screenshot to be saved to your desktop.

    Capture a window or menu

    1. Open the window or menu that you want to capture.

    2. Press and hold these keys together: Shift, Command, 4 and Space bar. The pointer will change to a camera icon. To cancel taking the screenshot, press the Esc (Escape) key.

    mac-key-combo-diagram-shift-command-4-space,

    3. Click the window or menu to capture it. To exclude the window's shadow from the screenshot, press and hold the Option key while you click.

    4. If you see a thumbnail in the corner of your screen, click it to edit the screenshot. Or wait for the screenshot to be saved to your desktop.

    Where to find your screenshots

    By default, screenshots will be saved to your desktop with the name ”Screen Shot [date] at [time].png.”

    In macOS Mojave or later, you can change the default location of saved screenshots from the Options menu in the Screenshot app. You can also drag the thumbnail to a folder or document.


Edit page