my-cumbria-logo, my-cumbria-logo Toggle navigation

Deleting files from your computer, other device or cloud storage is very simple and all of your devices will have the option to clear out files that you no longer need. See the sections below labelled as "Simple Delete". Note: When completing a simple delete, these files may be recoverable from the Recycle Bin or by using specialist file recovery software.

There are some circumstances where you may need to completely delete files so that they are no longer recoverable. This will usually be confidential information such as notes or images from a placement, private recordings of clients or practice patients or any other information/files that may identify an individual student, client or patient. See the sections below labelled as "Secure Delete".

  • Simple Delete or Secure Delete?

    About file deletion

    On most systems (including Windows and Mac) when you delete a file, that file is not actually deleted. What happens is that the computer will remove all links and references to it. With this done, you cannot see the file or search for it because the computer no longer knows where to find it.

    The space that the file occupies is now declared as empty space and at some point another file will start to use that space and the original deleted file will be gone.

    Until the space occupied by the original deleted file has been used a few times, it is possible to recover some or all of the original file using specialist software.

    Simple Delete

    A Simple Delete will either drop your file into the Recycle Bin or will appear to delete the file from your device (bearing in mind the information above). This is fine for getting rid of clutter or old files that you no longer want. You can then go and empty the Recycle Bin and continue to use your device as normal.

    The types of files you might want to Simple Delete include:

    • Downloaded files
    • Application/software installation files
    • Old documents or old drafts of work
    • Images, audio or videos that you no longer need
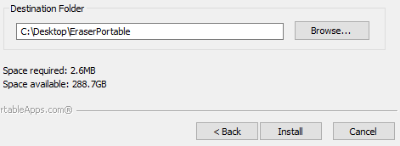
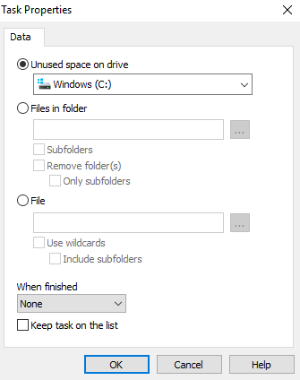
    Secure Delete

    A Secure Delete will completely remove the files from your device. Securely deleted files should not be recoverable, even with specialist software. On most devices you will need to use specialist software to permanently remove files and we offer some suggestions in the Secure Delete sections below.

    The types of files you may need to Secure Delete include:

    • Notes from placements, especially if they could be used to identify a location or person
    • Video and audio recordings with clients or "practice" patients
    • Any data or information that you don't own i.e. data sourced as part of an assignment or study
    • Personal files or images that you don't want anyone to have access to i.e. bank statements, scan of your passport, any private content


  • Simple Delete

  • Windows - Simple Delete

    Simple delete files/folders

    To do a simple delete of files on a Windows computer could not be much easier.

    Click on a file or folder and hit the Delete key on your keyboard. Depending on your settings, you may be prompted to confirm you want to delete the item, at which point you click Yes. This item is now placed in the Recycle Bin. If you deleted something by mistake, you can simply go into the Recycle Bin and select to Restore the file(s) - no harm done.

    Bypass the Recycle Bin

    If you select a file and press Shift+Delete on your keyboard, the selected file(s) will bypass the Recycle Bin and will disappear. You cannot recover the file(s) from the Recycle Bin, because they are not there. Specialist software can recover these files.

    Remember

    Using Simple Delete techniques will not fully delete your files. To permanently remove files and folders from your Windows PC, you should see the Windows - Secure Delete section below.

    Some files and folders won't delete

    On all devices there are some files and folders that are designated as System Resources and deleting these will compromise or break your device. Because of this, a large number of files are protected and you will not be able to delete them.

    Do not delete software - uninstall it

    Unless you know what you are doing, do not try to delete software from your computer by any other method apart from using the built-in Apps & Features function. Using Windows Search find Apps & Features, select a piece of software from the list and select Uninstall. Follow the on screen prompts.


  • OneDrive - Simple Delete

    You can delete specific files or photos on Microsoft OneDrive, or you can delete entire folders and all the items in them. If you need to, you might be able to restore deleted files from the OneDrive recycle bin.

    1. Go to the Student Hub and select OneDrive.

    2. Select the files or folders you want to delete by pointing to each item and clicking the circle check box that appears. (The first image below shows items in List view, the second image shows items in Tiles or Photos view.)

    OneDrive simple delete 01,  Onedrive simple delete 02,

    3. To select all files in a folder, click the circle to the left of the header row, or press CTRL + A on your keyboard. (You can also select several files at once by selecting one file, scrolling down the list, then hold down the Shift key while left-clicking the last item you want to select.)

    OneDrive simple delete 03,

    4. On the bar at the top of the page, select Delete. (You can also right-click the selected file or folder and select Delete.)

    5. To delete a folder, rather than just its contents, you may need to go up or back a level to select the whole folder.

    OneDrive simple delete 04,  OneDrive simple delete 05,

    OneDrive and your own computer files

    If you have linked your OneDrive to a folder on your computer, deleting the file from OneDrive will also delete that file from your computer. To stop this from happening you will need to move any files, that you want to keep on your computer, out of the OneDrive folder before you delete them online.

    Text and images in this section are courtesy of Microsoft: Delete files or folders in OneDrive - Office Support (microsoft.com)

  • Mac - Simple Delete

    There are a few ways to do a Simple Delete on the Mac operating system, these are:

    Drag to Trash

    Simply click on an item or folder and drag it over the Trash icon in the Dock (that row of icons at the bottom of your screen).

    Keyboard Delete Key

    Select one or more items in Finder, or on your desktop, and hit the Delete key on your keyboard.

    Finder Menu

    When working in Finder, you can select one or more files and then click on the File menu button to select Move to Trash.

    Right Click

    Clicking on a file whilst simulating a right-click (press the Ctrl key on your keyboard when clicking on an item) will show you a context menu that includes the option to Move to Trash.

    WARNING: All of the methods above will move your files into the Trash. These files can be recovered by simply opening up the Trash and dragging selected files back to either the Desktop or another location. They can also be recovered by right-clicking on files and selecting to Put Back which will return them to their original location.

    If you select to Empty Trash then your files will no longer be discoverable, but may still be recoverable by specialist software.


  • iPhone/iPad - Simple Delete

    Deleting Documents

    To do a Simple Delete of documents on an iPhone or iPad, it is best that you open up the Files App:

    ios_files_app,

    Deleting a single item

    1. Browse to the location of the file.

    2. Press and hold an item to see the pop out context menu, then select Delete.

    Selecting more than one item

    To select more than one item for deletion, you will need to:

    1. Browse to the location of the files.

    2. Click on the Select button at the top of the screen.

    3. Tick the checkbox that now appears next to all the items in that folder.

    4. Click on Delete at the bottom of the screen.

    Deleting a folder

    You should be able to use either method (above) to delete a folder, but you may find that you have to delete everything within the folder first.

    Some files and folders won't delete

    On all devices there are some files and folders that are designated as System Resources and deleting these will compromise or break your device. Because of this, a large number of files are protected and you will not be able to delete them.

    Deleting images, video and other media

    A Simple Delete of images and media files will usually be completed through the Photos App and then following the process for deleting files: 

    Deleting a single item

    1. Browse to the location of the file.

    2. Press and hold an item to see the pop out context menu, then select Delete.

    Selecting more than one item

    To select more than one item for deletion, you will need to:

    1. Browse to the location of the files.

    2. Click on the Select button at the top of the screen.

    3. Tick the checkbox that now appears next to all the items in that folder.

    4. Click on Delete at the bottom of the screen.

    Recently Deleted

    All documents, files, images and media deleted using the methods above are now in a Recently Deleted folder. Items can be easily recovered from here for up to 30 days after deletion.

    iCloud Backup

    REMEMBER: Many folders and files on an iPhone or iPad will automatically backup to iCloud and/or iTunes. You may need to delete copies of your deleted files from here too.

    Deleting Apps

    Do not attempt to locate App files for deletion as this may have negative consequences for your device. Always uninstall an App using the official method:

    1. Touch and hold the App icon.

    2. Tap on Remove App.

    3. Tap Delete App and then tap Delete to confirm.

  • iCloud - Simple Delete

    You can manage and delete folders or files you store in iCloud Drive from your iPhone, iPad, iPod touch, Mac or PC. 

    With iOS 11 or later, files that you delete from iCloud Drive remain in Recently Deleted for 30 days before they're removed from your device.

    iPhone, iPad or iPod touch

    1. 1. Go to the Files app and tap Browse.
    2. 2. Under Locations, tap iCloud Drive > Select.
    3. 3. Choose the folders or files that you want to delete, then tap Delete.
    4. 4. Go to Locations > Recently Deleted > Select.
    5. 5. Choose the files that you want to delete.
    6. 6. Tap Delete.

    Mac

    You can manage your iCloud Drive files from the iCloud Drive folder in Finder:

    1. 1. If you need to, turn on iCloud Drive on your Mac:
      1. a. Go to Apple menu > System Preferences > Apple ID, then click iCloud.
      2. b. Sign in with your Apple ID.
      3. c. Turn on iCloud Drive. In Options, make sure you select the apps or folders for the files you want to manage.
    2. 2. Open Finder and go to the iCloud Drive folder.
    3. 3. Drag an item to Bin, or move it to a different folder on your Mac.
    4. 4. Open Bin, then right-click the files you want to delete.
    5. 5. Select Delete Immediately.

    Windows

    On a PC with Windows 7 or later, you can manage your iCloud Drive files using Windows Explorer. Use these steps to add an iCloud Drive folder to Windows Explorer:

    1. 1. Download and install iCloud for Windows.
    2. 2. Sign in with your Apple ID.
    3. 3. Turn on iCloud Drive.
    4. 4. Go to the iCloud Drive folder.
    5. 5. Select the folders or files you want to delete.
    6. 6. Click Delete.

    iCloud.com

    1. 1. From your iPad or computer, sign in to iCloud.com.
    2. 2. Tap the iCloud Drive app.
    3. 3. Select the files that you want to delete, then tap Delete.
    4. 4. Open the iCloud Drive folder and tap Recently Deleted.
    5. 5. Select the folders or files you want to delete.
    6. 6. Tap Delete.

     Information in this section taken from: Manage your iCloud storage – Apple Support

  • Android - Simple Delete

    To complete a Simple Delete on an Android device, you will need to first locate the file(s).

    Locating and deleting files on an Android device

    All Android devices have a file manager already built in. Depending on the device manufacturer and the age of the device, these will have different names and icons. They may be called Files, File Manager, File Explorer or something else.

    For the purposes of these instructions, I have installed the Files by Google app from the Play Store. This is a free app which works brilliantly at showing, sharing and managing the files on Android devices.

    1. Open the Files by Google app, select Browse at the bottom of the screen and you will find that your files have already been categorised into:

    Downloads
    Images
    Video
    Audio
    Documents
    Apps

    Android simple delete 01,

    2. This should allow you to easily find files that you want to delete, but you can also use the Search function to directly discover a file if you know all or part of the file name.

    Android simple delete 02,

    3. Press and hold to select one or more items and a Delete button will appear at the foot of the screen. Hit delete to remove any selected file(s).

     Android simple delete 03,

    Note: Deleted files may still be recoverable unless your device is using encrypted storage. See Android - Secure Delete for more information.

    Some files and folders won't delete

    On all devices there are some files and folders that are designated as System Resources and deleting these will compromise or break your device. Because of this, a large number of files are protected and you will not be able to delete them. On an Android device, protected files are usually hidden from view and will require a change to device settings to make them visible. You should not attempt to do this unless you know what you are doing.

  • Pendrives / Flashdrives - Simple Delete

    Where possible, you should not be using portable storage such as pendrives for storing, moving or sharing any files. You can use your university OneDrive for this purpose. See Cyber Security | Portable Media for more information.

    Simple Delete from pendrives and other portable media

    To complete a Simple Delete of items on a portable drive, you simply need to follow the instructions for your computer operating system.

    Plug the portable drive into either your Windows computer or your Mac and then browse for items using the information provided on this page for Windows - Simple Delete or Mac - Simple Delete.

  • Secure Delete

  • Windows - Secure Delete

    There are various ways to permanently delete files on a Windows computer and some are much more complicated than others. You may even have tools, through your anti-virus or security software that do this job for you. For the purposes of these instructions, we are going to use a well respected free 3rd party app called Eraser.

    Download Eraser

    The team over at PortableApps.com have made a portable version of Eraser available. This does not need a full traditional installation and will happily work from your desktop or a pendrive.

    Go to the following link and click on the green Download from PortableApps.com button.

    Eraser Portable (Secure erase utililty) | PortableApps.com

    Enable EraserPortable

    Once the download is complete (this should only take a moment as it is a very small file), locate and double click on the EraserPortable file:

    Windows Secure Delete 01,

    This will trigger what looks like a Windows program installation, but it is only unpacking it and you will not need any special permissions to do this.

    You will be asked to choose a location for the unpacking, click on Install and then a new EraserPortable folder will be created in the location you chose.

    Windows Secure Delete 02,

    Run EraserPortable

    Locate the EraserPortable folder and double click on EraserPortable.exe to run the program.

    Windows Secure Delete 03,

    Select files/folders for permanent deletion using EraserPortable

    With EraserPortable open you can add files for deletion using either of the following methods:

    Drag and drop - Simply drag any files or folders, on your computer or a pendrive, into the EraserPortable window and they will be placed into a list pending permanent deletion.

    Browse for files - This method takes a little more work, but you can click on the "Plus" symbol (top left):

    Windows secure delete 04,

    Which will pop up the following window:

    Windows secure delete 05,  

    The options on this screen are Unused space which allows you to permanently delete all previous deleted files (this can take some time on larger drives), Files in folder which allows you to browse for whole folders on your computer and File which allows you to browse for individual files.

    Whilst browsing, you can select folders/files - click Open in the browse window and then click OK in the EraserPortable popup window. Your selected folder/file will now be added to the deletion list.

    Permanently delete your files

    With your list of files ready, select them individually or click on Edit > Select all.

    Some of the buttons in the top toolbar will change colour and allow you to perform actions:

    Windows secure delete 06,  

    Red X (Delete Task) - this means remove the task / cancel the deletion for this file. Any folders/files selected will be removed from the list and will not be deleted.

    Green Play Button (Run) - this will begin the task of permanently deleting the selected folders/files. Clicking on this will present an additional warning to make sure you want to continue.

    CAUTION!

    A permanently deleted file, using EraserPortable is gone. You will not get that file back. Double check the list of files waiting for deletion and be sure they should all be there. The University of Cumbria, Eraser and PortableApps bear no responsibility if you delete the wrong files.


  • OneDrive - Secure Delete

    Having done a Simple Delete on files in your OneDrive, they drop into the OneDrive Recycle Bin from which you can restore them if you need to. To make sure these files are permanently deleted, you will need to follow these steps (Note: You need to complete ALL of the steps):

    1. First, select Recycle bin in the OneDrive left hand side navigation.

    OneDrive secure delete 01,

    2. Select specific files or folders from the recycle bin (just like you would in any other folder in OneDrive) then select Delete in the top navigation.

    At this point, your files/folders should be gone but they are not. They are placed into a Second-stage recycle bin that holds them for 30 days in case you really didn't mean to delete them. To "finally" delete these deleted files you must now delete them again, but from this second stage area.

    3. At the bottom of the Recycle Bin page, you will see a link to the Second-stage recycle bin. Click on this link to see what is in this second recycle bin, select files and delete again.

    OneDrive secure delete 02,

    WARNING: Even now, your files are not completely and permanently deleted. There is a function in OneDrive that allows you to Restore your OneDrive. 30 days after deleting items from the Second-stage recycle bin, they will be gone forever.


  • Mac - Secure Delete

    Deleting files and folders on a Mac, simply places those items into the Trash and you can recover them by opening the Trash and dragging items back out.

    If you empty the Trash, then your deleted files are no longer discoverable, but may still be recovered by using specialist software. This will be enough for most purposes and the deleted items will be overwritten by new files over time.

    WARNING: If you have device sync enabled, you may also have copies of these files in your iCloud. Always check iCloud.com for copies and complete a Secure Delete here too. 

    Permanent Secure Deletion

    To ensure deleted files are totally and permanently removed, you will need to shred them using 3rd party eraser or shredding software.

    Not many products in this category are free for Mac. Permanent Eraser by Edenwaith is not only free, but is well respected in this area.

    1. Download and install Permanent Eraser from: Edenwaith : Products : Permanent eraser

    2. With Permanent Eraser now available as an icon in your Dock, you can simply drag files onto the icon for permanent deletion

    WARNING: Permanent Eraser will, by default, permanently delete your Trash whenever it is started. You will be warned it is going to do this and you will have the option to refuse/cancel.

    Note: With macOS Catalina and later, Full Disk Access needs to be enabled to allow Permanent Eraser to erase the contents of the Trash.

  • iPhone/iPad - Secure Delete

    After deleting files on an iPhone or iPad, these items are placed into the Recently Deleted area for 30 days. Your deleted files are easily recovered from Recently Deleted unless you delete them from here too.

    Delete Recently Deleted

    1. Open the Files app on your iPhone or iPad.

    2. Reveal the sidebar in the app by tapping the Browse button.

    3. Tap Recently Deleted from the sidebar.

    4. Tap Select in the top right-hand corner.

    5. Select Delete All at the bottom of the page.

    6. Confirm that you wish to delete the files.

    Because iPhones and iPads use encrypted storage, this should be enough to ensure that your files are gone and will not be recoverable and whilst specialist software may be able to access deleted files, it is very unlikely that they can be found.

    WARNING: If you have device sync enabled, you may also have copies of these files in your iCloud. Always check iCloud.com for copies and complete a Secure Delete here too.

  • iCloud - Secure Delete

    Once you have completed a Simple Delete of files/folders in your iCloud, they can still be recovered for up to 30 days after deletion. To speed up this process and ensure that the deleted files are gone forever, you will need to login to iCloud.com on the web (this process cannot be completed using the iCloud or iPhotos apps).

    1. Login to icloud.com

    2. Click on the Settings button

    3. Scroll down to the bottom of the screen (under the "Advanced" heading) and select Restore Files

    4. This will open up what is essentially a Recycle Bin and will be populated with your Recently Deleted items

    5. If you have made a mistake deleting a file/folder, you can select them in this list and choose to Restore them

    6. Select items in this list and click on Delete to permanently delete them

  • Android - Secure Delete

    If your device is set up to use "encrypted storage", then a Simple Delete will usually be enough to permanently remove files. If you are in any doubt, then follow the instructions here for a Secure Delete.

    Apps for Secure Delete

    Some Android devices will already have a secure delete feature built into either the file management app or through security settings, but because all manufacturers handle this slightly differently (and some don't include it at all) I am going to use the free Shreddit Data Eraser App. There are many other similar apps available, both free and paid for, but always check the ratings and feedback before installing one.

    Shreddit

    1. Download and install Shreddit from the Play Store: Shreddit - Data Eraser - Apps on Google Play

    2. Open the app and accept the request to access images, media and files - this is needed to allow files to be deleted.

    3. At the top of the screen is a grey bar and image that says Internal Storage - you can click on this to start browsing for files to delete.

    WARNING: On the Internal Storage bar is a three dots menu that gives the option to "Erase full storage". Do not select this unless you are intending to completely wipe your device prior to selling it. This option will permanently delete everything on your device.

    4. When you have located the file(s) and/or folder(s) that you want to Secure Delete - tick the box next to their name

    5. Hit the red floating Shreddit icon.

    6. You will be prompted to confirm that this is the file/folder you want to delete.

    WARNING: Once an item is deleted using Shreddit, it cannot be recovered. It is gone. Make sure you are only deleting things you want gone.

    There are lots of additional settings available in Shreddit, including the strength of shredding, but the default settings are perfectly fine for most users.

    Memory Cards

    If you want to Secure Delete files from a memory card that is inserted into your Android device, Shreddit needs a whole new set of permissions and Android settings changes - it is best to remove the memory card and delete the files using a computer.

  • Pendrives / Flashdrives - Secure Delete

    Where possible, you should not be using portable storage such as pendrives for storing, moving or sharing any files. You can use your university OneDrive for this purpose. See Cyber Security | Portable Media for more information.

    Secure Delete from pendrives and other portable media

    To complete a Secure Delete of items on a portable drive, you simply need to follow the instructions for your computer operating system.

    Plug the portable drive into either your Windows computer or your Mac and then browse for items using the information provided on this page for Windows - Secure Delete or Mac - Secure Delete.

Related Content

File and Document Backup Strategies

File and Folder Management

Research Data Management (RDM)

Edit page